The Magnificence that is Boxty

“Boxty in the griddle, boxty in the pan, if you can’t make boxty, you’ll never get your man”.

This underscores the love my Emerald Isle kin feel for the mighty potato bread, boxty. I’m kind of surprised my Irish grandmother didn’t impart this bit of wisdom on me herself, though I am sure if she lived to see me to marrying age, she would have.

Ahhh, boxty. Yummm, boxty! And, for those of us without Irish relatives to sing us jingles reminding us about the precipitous nature of our own marriageability, just what in the heck is boxty, anyway?

A celebration of the humble potato and a product that is greater than the sum of its parts, boxty is a combination of both mashed and grated tater, combined into one glorious foodstuff. And by stuff, I mean stuff-it-in-yo-mouth. It can be savory, it can be sweet, it can be boiled like a dumpling, baked like a loaf or, most popularly, pan- or griddle-fried, like a pancake. Today, we’ll be frying the boxty in a pan. Boxty’s name is derived either from the Gaelic “arán bocht tí”, poor house bread, or “bácús”, bake house. I lean toward the former etymology, since this is clearly peasant food. While making my boxty for this blog, I thought, what if I were a housewife in pre-famine Ireland, reliant on potatoes, with a husband who ate, so say historians, up to 6kg (or, 13 pounds, for those not on the metric system) of potatoes a day? How do you look at a pile of leftovers, think about hungry mouths, and stretch the taters to tomorrow and not let precious food go to waste? By grating the fresh potatoes into the mashed, they become not only something different, but they also become portable. It’s significantly less trouble to wrap pancakes in wax paper and slip them in a lunch pail than it is a pile of mash. Boxty, from the perspective of frugality and ease, is a win/win. And it’s delicious. Win/win/win.

Side note: I realize the presence of white flour and eggs would drive boxty more toward an indulgence rather than a poverty-kitchen staple, but I’ve seen traditional recipes that call for no flour, or oat flour, and no eggs, with the starch from the potato wrung out and added back in as a binder. Once upon a lean time you could make boxty with water instead of milk. What I’m working with are more modern adaptations.

The best time to make boxty is when you’ve already got mashed potatoes on hand, and that’s where my recipe begins.

[Click here for a printable .pdf file of Irish Boxty]

If you need to boil and mash potatoes first, you’ll need about a cup of mash so boil accordingly, and don’t forget to season accordingly with salt and pepper. If you’ve never done this before, maybe mash a little rosemary in with your potatoes, since rosemary loves potatoes. It will make your boxty inherently savory, but once I started doing this I never looked back.

Grate fresh potatoes. I know, I know, there’s the argument between using floury vs. waxy potatoes. I understand the love for the softer nature of the Russet potato, but I generally prefer waxy Yukon golds. Use what you like, it’s your kitchen! Take your grated potatoes and put them in a lint-free kitchen towel (one that is smooth cotton, and not fluffy at all) and WRING THE HECKIN’ HECK out of them. There’s a lot of water trapped in a potato. Get rid of it so they receive flavors better and your batter doesn’t slime out.

Fun fact! That potato water can be saved in a bowl and allowed to sit. When it sits, the starch from the potatoes will fall to the bottom of the bowl, and that starch can be dried and used for laundry.

Combine your taters, and add in your eggs. You can beat the eggs lightly if you think that will help you combine them evenly. Whisk the dry ingredients together and add that to the potato-egg mix.

Once you’re here, stir in the milk. Boxty is often made with buttermilk, but you can use regular milk, or a vegan milk like almond or oat, as long as it’s not, for example, vanilla-flavored almond milk. If you don’t have buttermilk but want the tang you’d get from it, add about a half-teaspoon of lemon juice or vinegar to your milk. Remember to add the milk in increments, so you don’t thin out the batter. When you’re done, it’s time to start cooking.

Heat a pan and when it’s fairly hot, add the cooking oil of your choice (mine is almost always olive oil) and a big honkin’ tablespoon of boxty batter. How much is that?

This much.

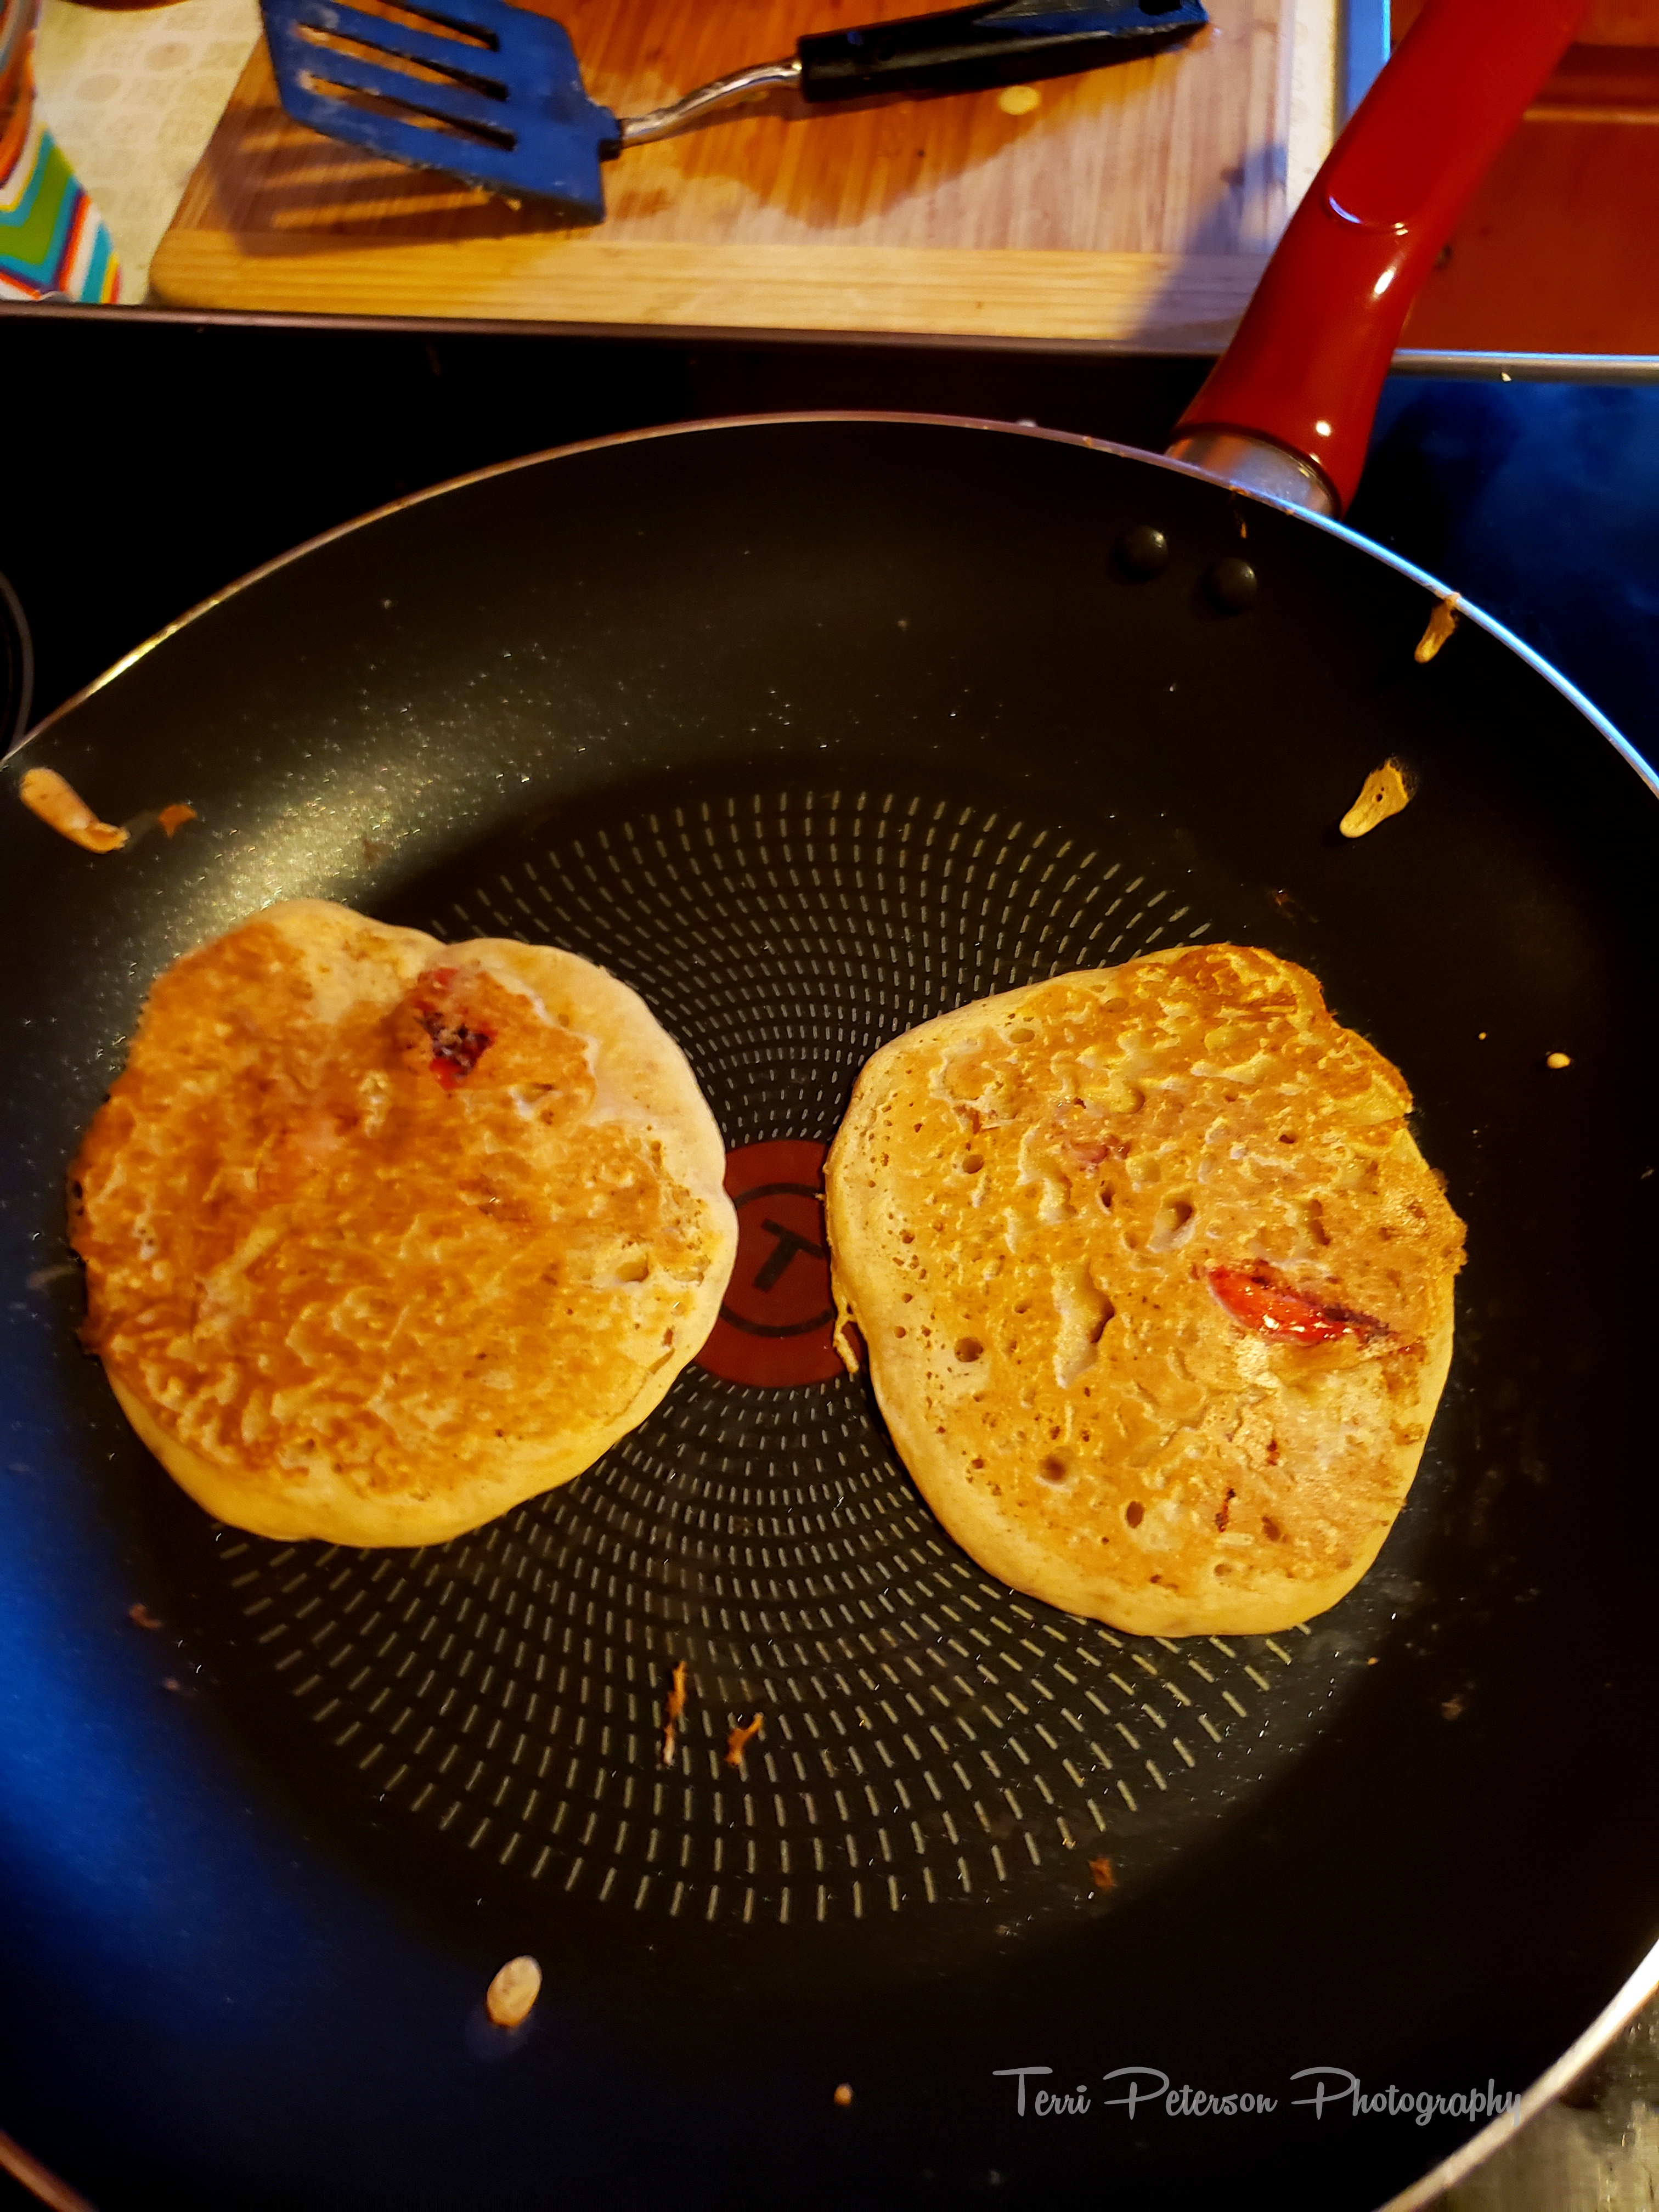
I got three in a pan comfortably without crowding, and that’s what you want. You don’t want them too close in the pan, because food needs room, and that’s a common error that we all make in the kitchen. Flatten the boxty out in the pan and step away. Cook for about four minutes on each side. You can always peek to see if they’ve turned golden and beautiful, but you should look for dried sides on the cakes as a signal.

See? Personal space in the pan is respected, and boxty are golden and fluffy, just like they ought to be.

I think I got eight cakes out of this batch. One of the things my Irish grandmother used to say all the time is that my eyes were bigger than my stomach, and with boxty, that’s easy to do. As delicious as it is, you really know you’re eating something when it’s on your plate. If you take down more than two of these in one sitting…my hat is off to you.

So here are the results of our labors. Boxty, grilled asparagus, vegan sausage, and a green salad and homemade vinaigrette.

Notice the internal texture. It’s fluffy, but you can still get a little bit of textural play from the grated potatoes. If you make this thinner, you could use it as a burrito wrap. If you make it thicker…exercise moderation and just have one. I doubt my knowledge of boxty helped me find my husband, mostly because I’d not heard of it until we traveled to Ireland. Together. But we can equally enjoy the history and traditions from both sides of our family, that can be traced to this beautiful potato pancake.

Hoe Cakes. Johnny Cakes. Same thing, different names.

Way back in the misty murkiness of time when the United States was still a young republic, a recipe emerged on the American food scene. Which is funny, because we don’t really think of post-Colonial America as something with a “food scene” but nevertheless, people had to eat. The recipe was, at its heart, a flat griddle cake made of ground corn, water or milk, and cooking fat. In the North, this recipe was called a Johnny cake (jonnycake, Shawnee cake, journey cake, any John’s no-cake, and I’m not making that up). Rhode Island has, to this day, made an institution of the Johnny cake, even seeing the particulars of the cake debated in local government.  Southerners called this recipe a hoe-cake, or an ash-cake, or (begrudgingly) a Johnny cake, and to this day they cling to the hoe-cake. Early cookbooks demonstrate that cooks tried to shove a crowbar between the recipes to differentiate them. For example, hoe-cakes were to be cooked on a griddle while Johnny cakes were cooked on a board; please refer to “I’m not making that up”, above. This helps to illustrate a few points:

  1. Corn is ubiquitous to the American way of life.
  2. These cakes are low-rent food meant to fill people up for as little cost as possible.
  3. The North and the South still can’t agree on what to call these things. Though to be fair, New England also can’t agree with the rest of the country on chowder or bowling, so maybe this is par for the course. Also to be fair, they’re not the only place where local beliefs hold strong. But I digress.

Purists aside, most recipes have merged into one overarching ideal–that hoe-cakes and Johnny cakes are now the same thing, though I’m committing to a Southern bias here in using the name hoe-cake and serving them with okra. Whatever you call them, they are cornmeal mash pancakes, cooked on a griddle (a/k/a a “hoe”, a colloquialism that dates back to the 17th century), can be bangin’ if they are done well and are American AF.

So how do you make them?

[Click here for a printable .pdf file for hoecakes]

This is a pretty basic pancake recipe when you get down to it. So make a pancake. Mix together your dry ingredients, and use the cornmeal of your choice. Some folks will insist on finely-ground meal. I like a little texture so I generally choose stone-ground meal. It’s your kitchen, you decide.

In a large measuring cup, measure your buttermilk, and then crack your eggs into the buttermilk and whisk them together. Whisk the honey in with the milk and eggs. I prefer these on the sweeter side so I use two big ol’ tablespoons of honey in my mix, but feel free to use less honey than I do if that’s what you prefer. Pour the milk/egg/honey mix into the dry ingredients and stir together. It will be very thick and lumpy and not appetizing at all, but that’s OK. You still have to add oil and water. Many recipes will tell you to use a neutral oil, like canola or corn, but I like the taste of olive oil so that was my choice.

Once the oil and water are mixed in the batter will become very sloppy, so stir slowly at first, and make sure you deep-dive your spatula to the bottom of your mixing bowl to pull up all the flour/buttermilk mix. It will eventually combine into a relatively smooth batter, but don’t sweat it! A few lumps are OK.

And then cook it on your hoe. I mean griddle. Pan. Whatever you have.

Heat a non-stick or cast iron pan over medium heat. Get some cooking fat in the pan; traditionally, people use butter, or even bacon drippings, which would be tremendous but would make it impossible for my vegetarian husband to eat. Since I’ve already declared my love of olive oil and used it in the pancake mix, that’s the oil I cooked them in too because why not. When the oil is hot scoop out about 1/8 cup batter (half of a 1/4 cup measure, if you don’t have an 1/8 cup in your kitchen set) and let it rip. Like any pancake, watch for the bubbles to form and the edges to start to dry as it cooks.

When the cakes start to look like this, give them a flip.

And if you’re very good, they’ll be golden and delicious. Note the edges, which are brown and crispy, and do indeed have a little snap when you bite into them. The pancakes should take about two minutes per side.

Since we were enjoying this specialty of the Southern United States, we served it with roasted okra, which is the easiest thing in the world to make.

BONUS RECIPE! [Click here for a printable .pdf file for roasted okra]

In a nutshell: Heat oven to 450°F (230°C). Clean about a pound of okra by washing, and trimming the stem cap and pointy end. Split down the middle. Ignore the slime, because it will bake out. Toss with olive oil, salt, pepper, a few shakes of cayenne pepper and about a Tablespoon of fresh thyme. Put in your hot oven and check it every seven or eight minutes. It’s done when the pods start to brown along the edges and are dry, which should take around 25 minutes total. Enjoy!

They would also be good with collard greens, bacon, maybe some baked beans. God, I love Southern food.

Take your beautiful, golden hoe-cakes and serve. Top them with a little butter and maple syrup, because that’s a winning combination on anything.

If you wanted to gourmet-ize these a little, you could add some fresh corn, sliced right off the cob, into the pancake batter. And corn loves thyme, so fresh thyme would work here too. Or you could just enjoy these hoe-cakes for what they are–simple ingredients made delicious, and a little piece of historical Americana, right on top of your table.

Dutch Baby, Savory Style

We’ve embarked on the SS Pancake Project to travel the world while we’re stuck at home through the marvels of pancakes and flatbreads. There are plenty of kinds of cakeybreads from all over the world that will suffice! One of my friends suggested the Dutch baby, a giant pancake that you bake in the oven and top with either savory or sweet things. OK, great! Dutch! Global! Travel! World! Only…

It’s an American creation.

One thing that can be hard to come by in the history of food is universal acceptance of a food’s origins and yet, it is universally accepted that the Dutch baby, neither Dutch nor small, was created in Manca’s Cafe in Seattle, WA, some time around the turn of the century. The 19th into the 20th century. I guess I have to specify this. Anyway. Based on the traditional German Apfelfannkuchen (which I totally plan to make on this journey), the Dutch baby was so named because restaurateur Victor Manca’s daughter was too young to say “Deutsch”, German, correctly. It’s the same jacked-up speech issue that gave us the term Pennsylvania-Dutch for PA German immigrants, but I digress. As goes the way of all things, Manca’s Cafe has now become a Starbuck’s. Moving on.

Want to just read the recipe with measurements and directions? Click below.

[Click here for printable .pdf file of Dutch baby, savory]

This recipe comes together relatively easily, so be ready to move. Heat your oven to 425°F (220°C) and move racks so that there is nothing over the middle rack. The Dutch baby will rise while it bakes and you don’t want anything to impede it as it cooks. Put a cast-iron/oven-safe pan in the oven (I really recommend cast iron here) and let it heat up too, because you want it to be hot and create lots of steam, which will aid in the Dutch baby’s rise.

Chop the mushrooms, mince the garlic, finely dice the onions, de-stem the thyme and chop your fresh herbs. Hold to the side.

Mix eggs, flour, honey, and milk into a smooth, fairly thick batter. Add half the thyme and fresh herbs, the salt*, and the pepper. Stir together.

*Keep an eye on the salt. Since I’m also adding salty cheese to the batter, and tossing more cheese on at the end, I don’t feel like this needs a bunch of salt in the mix.

Then, when the oven dings its ready hello, take the pan out and swirl two tablespoons of butter around the pan. If you don’t like butter you can use the oil of your choice, but the important thing is to coat the hot pan in cooking fat so it may then receive the Dutch baby batter. Pour it into the hot pan, and then top with about half of the grated cheese.

YUMMMMM. This is the Platonic ideal of “off to a good start”.

Put your Dutch baby back in the oven, and then get the mushrooms going. Heat a large (very large) pan, and the two tablespoons of olive oil. When the oil is nice and hot and ready to receive, add the mushrooms.

A few things about mushrooms.

  1. Yes, this pan is more crowded than I would like. But I also didn’t want to cook the mushrooms in batches because I am impatient. When mushrooms are this crowded they will more steam than caramelize. Which is still OK, since they will still release all the water in their cells and concentrate their mushroomy goodness. They just won’t turn caramelized and get as brown when they cook.
  2. If you are trying to caramelize the mushrooms, DO NOT TOUCH THEM. Leave them alone for 3, 4, 5 minutes. Don’t stir them. Don’t poke them with a fork. Don’t even breathe at them. Just leave them. If you start to turn them before they caramelize they will, as above, release the water in their cells and not get as brown as you’d like.
  3. This looks like a butt ton of mushrooms. Don’t worry. They cook down.

Once they have started to cook down, add the onions and garlic and let them all saute together. Then, add wine or broth and let that cook in for a few minutes. You’re almost there when you can’t really smell the alcohol from the wine, and/or the broth is nearly cooked out if you move things around in your pan. Should you need a few more minutes for the Dutch baby to finish baking and you don’t want to take the mushrooms off the heat, then drop the heat in your pan low and add broth or water in very small increments and stir, to prevent sticking.

Right before you are ready to take the baby out of the oven (that sounds alarming), stir in a nice big handful of greens, like spinach or arugula, and let it wilt in the pan. Finish the mushrooms and greens with the final tablespoon of butter and take them off the heat.

Now. Here comes the fun part.

Remove the Dutch baby from the oven. What you should, hopefully, see before you is a glorious shell that climbs upward toward Heaven because it is just that good.

Say hello gorgeous and thank your lucky stars that you have been given the ability to eat magical food like this. Add the mushroom mix in the middle and top with the remaining fresh herb of choice and Parmesan cheese.

Serve quickly, because this is essentially a sort-of flat souffle and it will start to fall as soon as it’s out of the heat. Cut that baby into slices and serve. This would go nicely with a simple green salad; we served ours with slow-roasted tomatoes because we had them in the fridge, and that will be a recipe for another day.

Now, it’s time to eat! Enjoy your food, and go check out what sort of delicious things the world has to offer.

Strawberry-Rosé Pancakes


Since this is “The Pancake Project”, I’d better start with actual pancakes, eh? These beautiful pancakes are mixed with a little fruit and a little rosé, for an elegant take on America’s favorite breakfast*.

* I don’t know if it’s America’s favorite breakfast.

Here’s what you need.

1 ½ cup chopped strawberries
1-2 tablespoons of sugar (depends how sweet your berries are)
2 cups whole wheat pastry or all-purpose flour
3 tablespoons ground flax seeds
1 tablespoon sugar
1 tablespoon baking powder
¼ teaspoon salt
1 cup rosé (if you don’t drink, just add an extra cup of your choice of milk)
1 cup almond or other nondairy milk
½ teaspoon vanilla extract
1 teaspoon rosewater
And here’s how you do it.
1) Cut your strawberries into bite-sized chunks, and mix them with sugar. Let them macerate while you prepare everything else. The longer they sit, the sweeter the strawberries will become, so plan your time accordingly.
Combine your dry ingredients. If you have ground flax seed…well done, you. If, like me, you do not, then grinding it yourself is the way to go, and it’s time to dig out either your herb grinder or your trusty mortar and pestle. IF, also like me, you use a mortar and pestle, take some of the salt and/or sugar from your dry ingredients and toss it in with the flax seed. It will provide a bit more grit and make the seeds easier to grind; otherwise, the seeds are slippy and will just squeak out from under your pestle, making the whole process more frustrating than it should be.
Once your dry ingredients are mixed, create a well in the center and pour in your milk, the vanilla, and the rosewater. Drain the strawberries and pour as much as 1/4 cup of the strawberry liquid into the rosé, and combine that with the other ingredients.
Mix this together into a smooth batter, and then re-chunk it by adding in 3/4 cup of strawberries. Set the rest of the strawberries aside until you’re ready to eat.
Take your non-stick pan and get it to about a medium heat. You’re good to go when you flick some water on the pan and it sizzles. If you don’t have a non-stick pan, coat your least-stick pan with some cooking spray. Scoop out about 1/4 cup of batter and pour it in. Wait until bubbles form across the top of the pancake and the sides look firm.
Then flip.
If you’re lucky, you’ll see that beautiful caramelization on the strawberries. That’s when you’ll know your meal is on track.
This meal might be a little intense for breakfast, but you can have it as a lovely brunch or breakfast-for-dinner, and finish that open bottle of rosé in the process. Top with the rest of the strawberries and some maple syrup. We had ours with watermelon, but bacon’s good for the carnivores in the house.
And that’s it! All you have left now is to enjoy it. I know we did.
Find the original recipe on Thug Kitchen.